


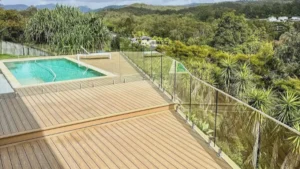
If your concrete slab or patio feels boring, install a composite deck over it to create a stunning and functional outdoor space.
Careful planning and proper installation of composite decking boards over concrete ensure lasting benefits and yield a high return on investment. If you’re unsure how to begin, we’re here to help.
As Australian decking suppliers with proven experience, we can help transform your outdoor space. This blog shares best practices for installing a deck over concrete to maximise your investment and bring your dream outdoor space to life.
Exploring the Feasibility of A Stunning Deck Over Concrete
You can transform your concrete patio into a resilient foundation for your new composite deck. On the other hand, a dilapidated or damaged patio can cause long-term problems. It’s important to note that not every concrete slab can accommodate these fixtures. For this reason, exploring various possibilities can help you determine whether this project meets your long-term needs.
If you need assistance, a reputable contractor can provide you with valuable insights and guidance, ensuring a safe, seamless project. Whether you prefer DIY or professional installation, these issues are worth considering:
Blocked existing doors
Installing a deck over concrete raises the surface by at least 100 mm, blocking existing doors and creating dangerous tripping hazards.
On the other hand, an increase of less than 100 mm might not accommodate the deck substructure, increasing the likelihood of a customised design.
Installing steps between the deck and yard, or a ramp from the door to the deck, removes hindrances, enhances safety, and facilitates smooth movements on the surface. Guardrails are usually necessary for patio surfaces exceeding 1m in Australia. Check your local building code if this requirement applies to your situation.
Multiple patio levels
Improvising around existing stairs and multiple levels can complicate your project. Homeowners building a multi-level deck can construct the substructure at a uniform height on each level, including over concrete steps.
Conversely, transforming a multi-level patio into a single-level deck is usually more tedious. You must raise the lower-level patio substructure’s height to match that of the upper-level’s. For instance, if their discrepancy is 150 mm, raising the lower-level patio’s substructure by 150 mm with spacers accomplishes this objective. The same principle applies to existing stair treads, especially if the new height is significant.
Concrete condition
Inspecting existing slabs for cracks, shifting, or water damage is critical to your project’s long-term success. Extreme temperatures can expand and contract the concrete, increasing the likelihood of costly repairs.
We recommend repairing your current deck if it has been damaged over time. A sinking deck may require slab jacking (pressure grouting) or replacement. On the other hand, water damage may require patching or replacement of damaged concrete. Finally, you can conceal small cracks with epoxy, latex, or a mortar mix. Bigger cracks may require slab replacement.
Sometimes, large cracks or significant damage compel homeowners to replace their patios rather than install a deck over them. Drilling or cutting through the slab, installing a post, and building the appropriate substructure may preserve your existing concrete structure. Consult a trusted contractor who can advise you on the next steps of your project.
Recommended Methods for Installing A Deck Over Concrete
You’re ready to install a deck over concrete after inspecting your concrete slab or patio and creating a feasible installation plan. Taking the necessary precautions and following these steps ensures a seamless, stylish, and enduring installation:
1) Collect the appropriate tools and materials
Installing a deck over concrete patio surfaces requires the right tools and materials, including:
- Mitre saw
- Jigsaw
- Cordless driver
- Hammer
- Measuring tapes
- Level
- String line
- Shovel
- Decking and joist boards
- Concrete and deck board fasteners
- Concrete
Ensure that each tool and material is suitable for outdoor use. You can buy or rent them from a local hardware store.
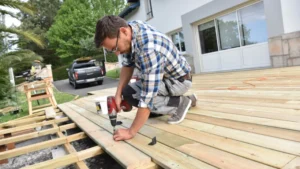
2) Install a durable, long-lasting substructure
A properly assembled, durable substructure ensures a safe, enduring, and functional deck. Installing a post-and-footer substructure or building a sleeper system sets the tone for your project. A sleeper system is fixed directly to the concrete with fasteners such as Tapcons to elevate the surface.
A raised substructure with posts and footers ensures a long-lasting, moisture-resistant deck. Since sleeper systems connect joists discreetly to the concrete slab, your deck will acquire the slab’s imperfections, including sinking, shifting, and misaligned installation.
These steps enable you to install a post and foot substructure through your slab:
- Measure the outer edges: Measure the deck with string lines, then determine the support post and footing locations on the concrete structure. The measurements will depend on joint size and spacing.
- Assemble concrete footings: Install the footings at the identified locations, ensuring they’re set below the frost line. Remove any existing concrete to install new footings if the slab interferes with their placement.
- Install the posts: Assemble the posts on the footings, ensuring no direct contact between the lumber and concrete to prevent moisture damage.
- Assemble the frame: Assemble joists, blocking, ledger boards, and other subframe elements to complete the deck structure.
3) Secure the substructure with joist flashing tape
Moisture can cause timber to crack, split, warp, and decay, compromising its long-term structural integrity. Securing the top of the joists with joist flashing tape prevents moisture, mould, mildew, and rotting damage, offering peace of mind and reassurance.
We recommend prioritising the ledger board area, taping the top of the joists where needed. Consider using an efficient water management system such as TimberTech DrySpace, which redirects water and protects your substructure from moisture damage.
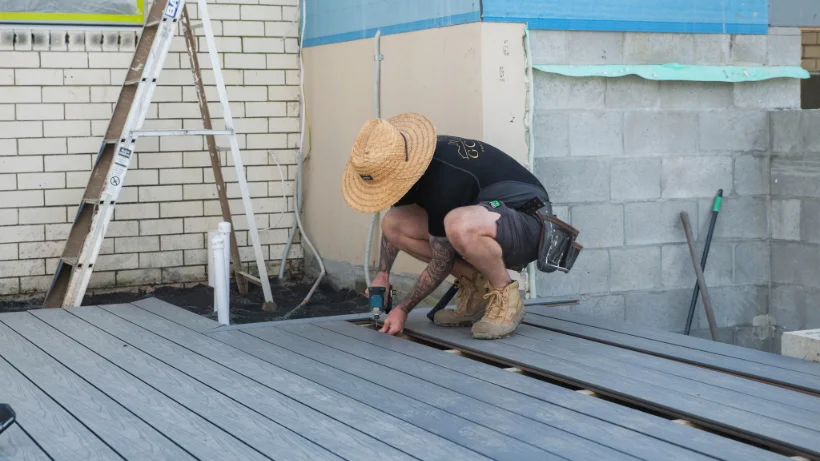
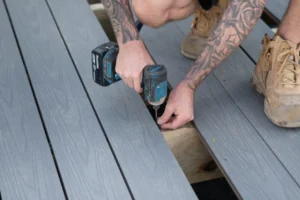
4) Lay the decking boards
Decking board installation depends on the selected material, deck design, and aesthetic preferences. Regardless of your specific variables, consulting a highly experienced deck installer helps you achieve optimal, long-term results.
Always use spacers to ensure even spacing between decking boards. A perimeter fascia or rim board conceals unsightly board ends and improves their visual appeal. Hidden fasteners contribute to an elegant, seamless finish.
It’s important to note that timber decking requires sanding, staining, and sealing to maintain long-term durability, aesthetics, and performance. On the other hand, you can install composite decking immediately after assembling the final board.
5) Complete the surface and decorate
Depending on the surface’s height increase and local building codes, you may require guardrails to enhance deck safety. Assembling stairs and decking lights adds unique, stylish finishing touches to your outdoor fixture. Once these components are installed, you can decorate your patio with the following:
- Furniture and seating: built-in benches, outdoor lounge sets, and weather-resistant fixtures.
- Shade solutions: Pergolas, retractable awnings, and large umbrellas.
- Planters and greenery: Integrated planters, freestanding pots, and vertical wall gardens.
- Outdoor dining: Barbecue stations, grills, prep islands, and outdoor refrigerators.
- Storage solutions: Deck boxes, bench storage, and outdoor cabinets.
- Privacy and screening: Privacy screens, shade blinds, or slatted screens.
- Decorative elements: Outdoor rugs, throw pillows, accent lighting, and sound systems.
Conclusion
Transforming an old, dull concrete slab or patio into a stunning deck requires careful planning and proper execution. However, following the recommended steps, including collecting the proper tools and materials, installing a durable substructure, using joint flashing tape, laying the decking boards, and adding safety elements and decorations, ensures an elegant, seamless, and long-lasting deck.
A premium deck can transform an ordinary outdoor space into an elegant outdoor sanctuary with a high return on investment.
Are you ready to transform your patio? Take that all-important first step with Ezy Decking, a trusted supplier of Sydney composite decking boards. Join our list of Australian clients who have expressed 100% customer satisfaction.
Ezy Decking provides premium quality composite decking boards with 10 year structural warranty to Brisbane, Gold Coast, Sydney & Northern NSW. Contact us today for a free quote.
Related Articles
Benefits of Aluminium Framing for Composite Decking
Composite decking enhances Australian homes, offering stylish, multifunctional outdoor spaces with strong investment returns. Whether your home is rustic, Mediterranean,…
Ultimate DIY Guide for Composite Decking
Premium composite decking gives Australian homeowners a cost-effective, visually appealing, and low-maintenance outdoor option. Whether for patios, balconies, pool areas,…
How Decking Colour Variation Enhances Your Outdoor Aesthetic
Composite decking boards have been a favourite lifestyle choice of many Australian homeowners. Their durability, visual and curb appeal, low…